Program Options

Contents
The program options panel gives access to general program settings and information resources. It is shown in place of the Overview panel after program startup and can also be reached by clicking the ![]() button in the Roadmap panel or via the main menu Tools > Options... .
button in the Roadmap panel or via the main menu Tools > Options... .

Buttons
About PLE |
Shows a separate window with program & copyright information. |
Help Contents |
Shows this help window with the contents list on the left side. |
Help Search |
Shows this help window with the search tab on the left side. |
PLE Options |
Shows the options panel. Please refer to the items below. |
 For users of the predecessor program PLE-micro-CAD. If checked, the DOS-style table- and column-names ("Shortnames (DOS style)") will be shown in the overview- and data table-panels. For more descriptive names, select the "Longnames" option. 
 ➢Check "Ask for ..." to prevent deleting rows by mistake. ➢Processing a function all input tables containing data should have the tested status. Checking "Automatically test ...", tables which do not have the tested status, will be tested before processing the function. ➢Normally input tables are cleared in the workspace. Using these option(s) will prevent this. |
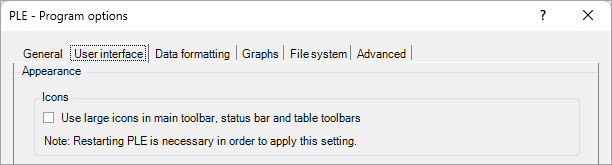 Small or larger icons & texts are used in the main toolbar, the status bar and the table toolbars. 
 Depending on the Brightness/Contrast setting of the monitor, selected cells can be hardly visible in the standard PLE contrast setting. Increasing the PLE contrast will remedy this. 
  |
 The option "No formatting" will show all available figures. This option is not recommended since in most cases this layout will not be clear.

Selecting "Apply scientific notation" will show all values with powers of 10. The "Minimum significant figures displayed:" determines the number of figures. 
Engineering notation is a version of scientific notation in which the powers of ten are multiples of three.The number of figures is determined by the smallest absolute value in each column. 
 Usually a user will use the system separators. However, by unchecking the checkbox "Use system separators" the user can define other characters as separators.
|
 The export size of images generated in Single Graph, Multi Graph, and 3D Visualisation can be configured here, regardless of whether the image is exported as a PNG, WMF, or copied to the clipboard. 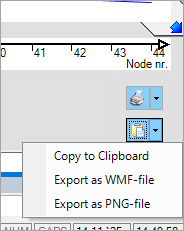 The "Default" size is 1075 x 760 pixels, but several other predefined sizes are also available.  To specify a custom size, select “Custom” from the dropdown menu. 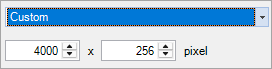
The "Position on paper during printing" of the exported image can also be defined here. 
 ➢Enable the option "By default ..." to display the AX–L coordinate system on the x-axis in Multi Graph. 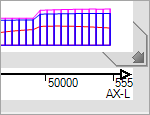 ➢Leave this option unchecked to display node or element numbers instead. 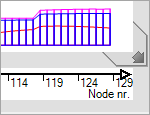
 ➢Enable the option "Ground-, water- ..." to display the ground level, water level or wave form as translucent ribbons in 3D Visualisation.  ➢If this option is unchecked, these levels will be displayed as simple lines instead.  |
 A PLE.plex project file in a Project folder is extracted in the Work folder. PLE uses these databases in the Work folder as long as the project is open. The.plex database is left unchanged, as long as no data is explicitly saved to it. Also the auto recovery data is saved in the Work folder as well as possible test output files (*.tst).
 If this backup option is checked, each time a project is closed a backup of the project is created with the state of the project before opening. The backup file is named ProjectName.pleb. Such a backup project can be opened again by choosing Ple4Backups as file type in the Open Project database dialog (or simply by double clicking on the backup file in Windows Explorer).  A backup is automatically saved in the Work folder every n minutes. This backup will be used to recover the project after a system crash.
 Select this option to show the Recent Projects list. The number of last projects to be displayed in this list can be chosen from 2 to 10. |
 ➢If "Enable test mode" is checked, a file named PLE.tst is created in the User Application Data Folder. Tracing information is written to this file during the run of the program.
➢The "Test level" is only available if the test mode is enabled. If the level is set > 0, while opening a pipeline project file, a file with the same name and with an file extension.tst is created in the Work folder. Debug information is written to this file until the project is closed.
➢The "Leave temporarily files ..." option is only available if Test mode is checked. Usually work files (ending with extension.tmp) will be deleted when closing a pipeline project. If this checkbox is checked, these files are not deleted.
 With a rental licence the hardware key verifies the date via the Internet. Some (company) firewalls prevent the key to access the internet, causing PLE not to start. If this checkbox is selected, the hardware key will not attempt to get access to the Internet.
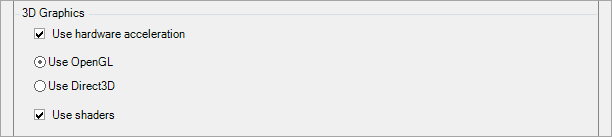 These options only affect the 3D visualisation and the 3D views of the soil wizard. Should drawing errors occur, clearing the 'Use hardware acceleration' checkbox might help as it disables acceleration within the graphics card. Disabling the shaders might also help in case of drawing errors.
|
ProgOptions (last modified: Nov 16, 2025)
See also: